Git startup guide part 2
This is part 2 of the git guide series, you can find the first part here, this part came late :( I know but I will not be so much late again for writing here.
In the previous part we introduced github, create a new repository, clone the repository to my laptop, using checkout to create a new branch and the basics of undoing work.
In this tutorial we will learn how to share our code with others on github, setup SSH key pair, create issues on github and branches for them, merge work between branches.
We will start from where we left in the previous tutorial, if you did not finish it you can go back now and follow it.
Share Work with others on github
The main benefit with github is that it can help you to share your work with others easily without having to create your own git server and share work with developers.
Make sure you are in the folder of git repository and on master branch by using
the git status command, if you are not on master branch use git checkout master
to switch to it.
Open your README.md file and add the following line to it Now I will change README.md file and share changes on github using git push command, save and exit the file.
If you check the output of git status it says that README.md file is modified, to commit
the modifications to git you can use git commit -a -m "Modify README.md file",
now check the output of git status again what does it say??
On branch master
Your branch is ahead of 'origin/master' by 1 commit.
  (use "git push" to publish your local commits)

nothing to commit, working tree clean
We can see that git noticed we have new commits to master branch locally but these
commits do not exist in origin/master on github so we need to push the new commits
to github and share them with everyone else.
To push our changes use this command git push origin master you are prompted to
enter your username and password on github, Oh my God do I need to enter them every time
I push code to github??? The answer is yes and no :)
Yes if you choose to continue to use HTTPS for the repository URL and No if you switch to SSH and that is what we will do in the next section.
Setup SSH key pair to access github
In the previous tutorial we used HTTPS when we cloned the repository from github using HTTPS is okay but to push and pull any changes we need to enter our username and password every time to prove our identity so github can decide if we are allowed to push the code or not (we cannot push code to repositories of other people without their permission), there is another way to prove our identity using SSH key pair.
In the next lines we will explain how to create SSH key pair and add them to our github account then switch our local git repository to use SSH url.
Create a key pair
From your git bash terminal execute the following command ssh-keygen, press enter
multiple times to accept defaults, do not set a key pass phrase. Once done you will
see a new folder called .ssh in your home directory and it contains two files
id_rsa and id_rsa.pub, these two files are your key pair, id_rsa is your private key
NEVER SHARE IT WITH ANY ONE, id_rsa.pub is your public key, this key must be
uploaded to github , so it can use it identify you when you push code.
Add the public key to your account
Open your github account settings here, select
SSH and GPG keys –> new ssh key, give your key a title and copy the contents
of id_rsa.pub to the key text box, open the file using notepad to copy its contents.
Switch your repository to use SSH URL
Now go back to your cloned github repository and execute this command git remote -v
you will see an output similar to this
origin	https://github.com/mohsenSy/test_repo.git (fetch)
origin	https://github.com/mohsenSy/test_repo.git (push)
The last command prints the defined remote repositories with their name and URLs,
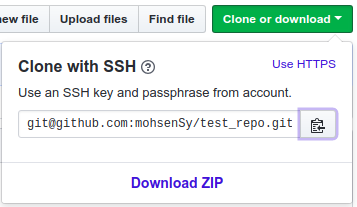
notice https at the start of the URL, to change it first we need t remove the origin
remote using this command git remote rm origin, then add it again using
git remote add origin git@github.com:mohsenSy/test_repo.git I got the SSH URL from
the main github repository page as shown here.
 .
.
Now you can try to make another change to the README.md file and push it again easily without entering your username and password.
Create github issues
Github issues is a way to organize your work with other developers, issues are used to report bugs so developers can work on them, work on new features or enhancements we can comment on them to follow our work and share it with others so they can give feedback even before code is pushed to github.
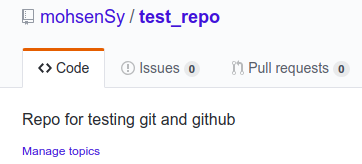
To create a new issue click on the issues tab on your repository main page
Create a new issue by clicking on New issue button, enter title and comment to describe the issue, it is recommended to have a small and meaningful title so we can search for the issue later on and the description must be clear to describe the bug, feature, enhancement or even question, once done click submit new issue to create it.
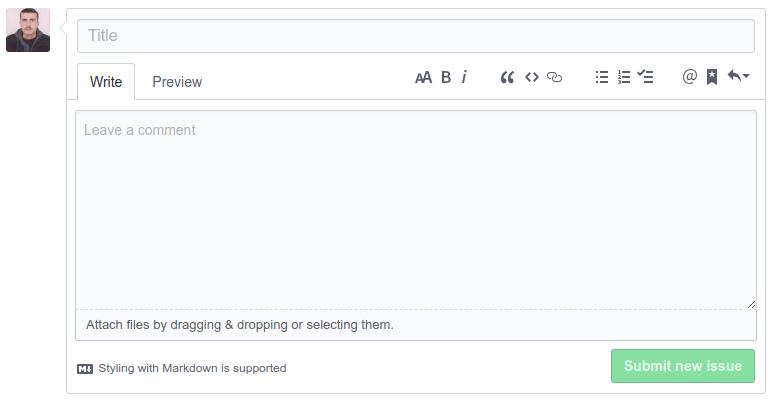
When we create a new issue we can assign it to people so they start working on it you can see the assign button on the right of the screen.
Create a branch for an issue
When an issue is created and assigned to other developer, he/she will need to create a new branch and start working on the issue.
To create a new branch we use checkout -b <new_branch_name>, but what name should
we give to the new branch??? Practically we can give any name that describes what
will we do but I prefer to use a naming scheme for branches created for issues as follows
- Start with the issue number 1,2,3,4,…..
- Follow it by the issue’s title after you change all white spaces with - character.
Actually this naming scheme is used automatically by gitlab and I prefer to use it when creating branches how ever you are absolutely free to choose what ever you like.
Merge branches
After you created a new branch for the issue as described previously you can start working on the issue right now using this branch and all changes you make will not be visible in the master branch until you merge with it, this is a very important feature of git that allows you to work freely on your code without fearing to break anything on master branch until you merge.
Open your README.md file and add the following line Practice merge with master.
Execute git status and make sure the output is similar to this.
On branch 1-First-issue
Changes not staged for commit:
  (use "git add <file>..." to update what will be committed)
  (use "git checkout -- <file>..." to discard changes in working directory)

	modified:   README.md

no changes added to commit (use "git add" and/or "git commit -a")
It says you are on 1-First-issue branch and you modified the README.md file,
now commit your work, remember the command to commit your work?? Check above please.
Let us assume that you are done with changes on your new branch and that the issue is resolved now, you need to merge current branch with master but first switch to master remember the command?? I hope you do because if not you better read previous tutorials first.
Okay it is git checkout master, now merge your new branch with master with this
command git merge 1-First-issue
If you execute git log you will see the last commit you created in master branch
because you merged master with the branch that created it.
Finally push new changes to github using this command git push origin master
Conclusion
In this tutorial you learned the following:
- Share code with others on github.
- Create SSH key pair and use it to authenticate with github.
- Create github issues and branches for them.
- Merge branches
I hope you find the content useful for any comments or questions you can contact me on my email address mohsen47@hotmail.co.uk
Stay tuned for more articles. :) :)