Secure Access to Digital Ocean resources using OpenVPN
Introduction
In a previous tutorial we described how we can use the OpenVPN one click installer on Digital Ocean and access it from Ubuntu using the GUI, today we will learn how to access Digital Ocean resources using their private IP addresses with help from OpenVPN one click installer, this is very important to secure access to our resources and prevent access using public IP addresses.
Digital Ocean private networking
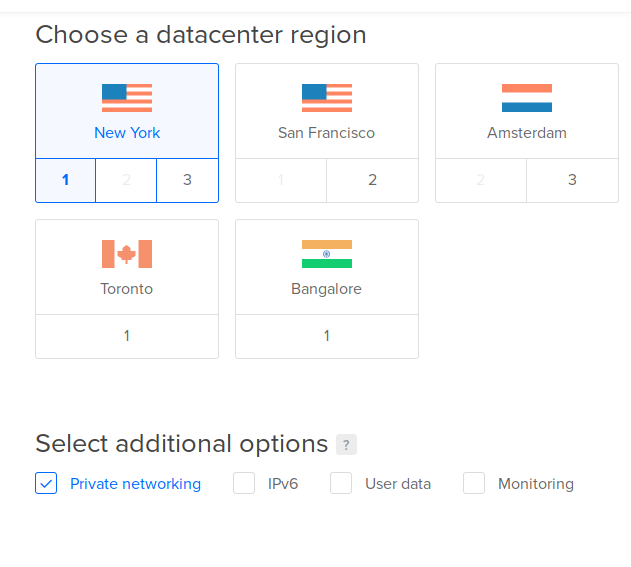
When you create droplets on Digital Ocean, each droplet is given a public IP address that anyone can connect to it also you have the option to enable private networking which gives your droplets extra IP address in a private IP range that cannot be accessed from the outside and only droplets in the same data center can connect using this private IP address, the following picture shows how to create a new droplet with private networking enabled
Hint: Private networking is not only available for droplets you can also enable private networking for Managed Database clusters too and some other DO resources.
Using private networking has several advantages:
- It is a secure connection between droplets that does not transfer packets using the public network.
- It is faster and has more available bandwidth than public networking.
- For public networking you will need to pay money if you exceed a threshold in your data transfer, while for private networking you do not need to pay anything at all.
Now since we learned about private networking it is time to list the tasks we will accomplish in this tutorial:
- Create an OpenVPN server using one click installer with private networking enabled.
- Create another droplet in the same region with private networking enabled.
- Configure OpenVPN to allow access to private network.
- Connect to the OpenVPN server from your machine and access private network range.
OpenVPN Access Server
To create an OpenVPN access server we will use the one click installer, we select Create –> Droplets and choose OpenVPN Access Server from DO marketplace, enable private networking and click Create.
Wait until the droplet is up and running and connect to it using root username and its public IP address, once connected you will be asked to configure OpenVPN Access Server accept defaults except when asked to route client traffic and DNS traffic using OpenVPN select yes.
After the configuration is done do not forget to set a password for openvpn user with this command
sudo passwd openvpn and use it when accessing the web interface.
Now open OpenVPN admin interface by visiting this URL https://<ip address>/admin where
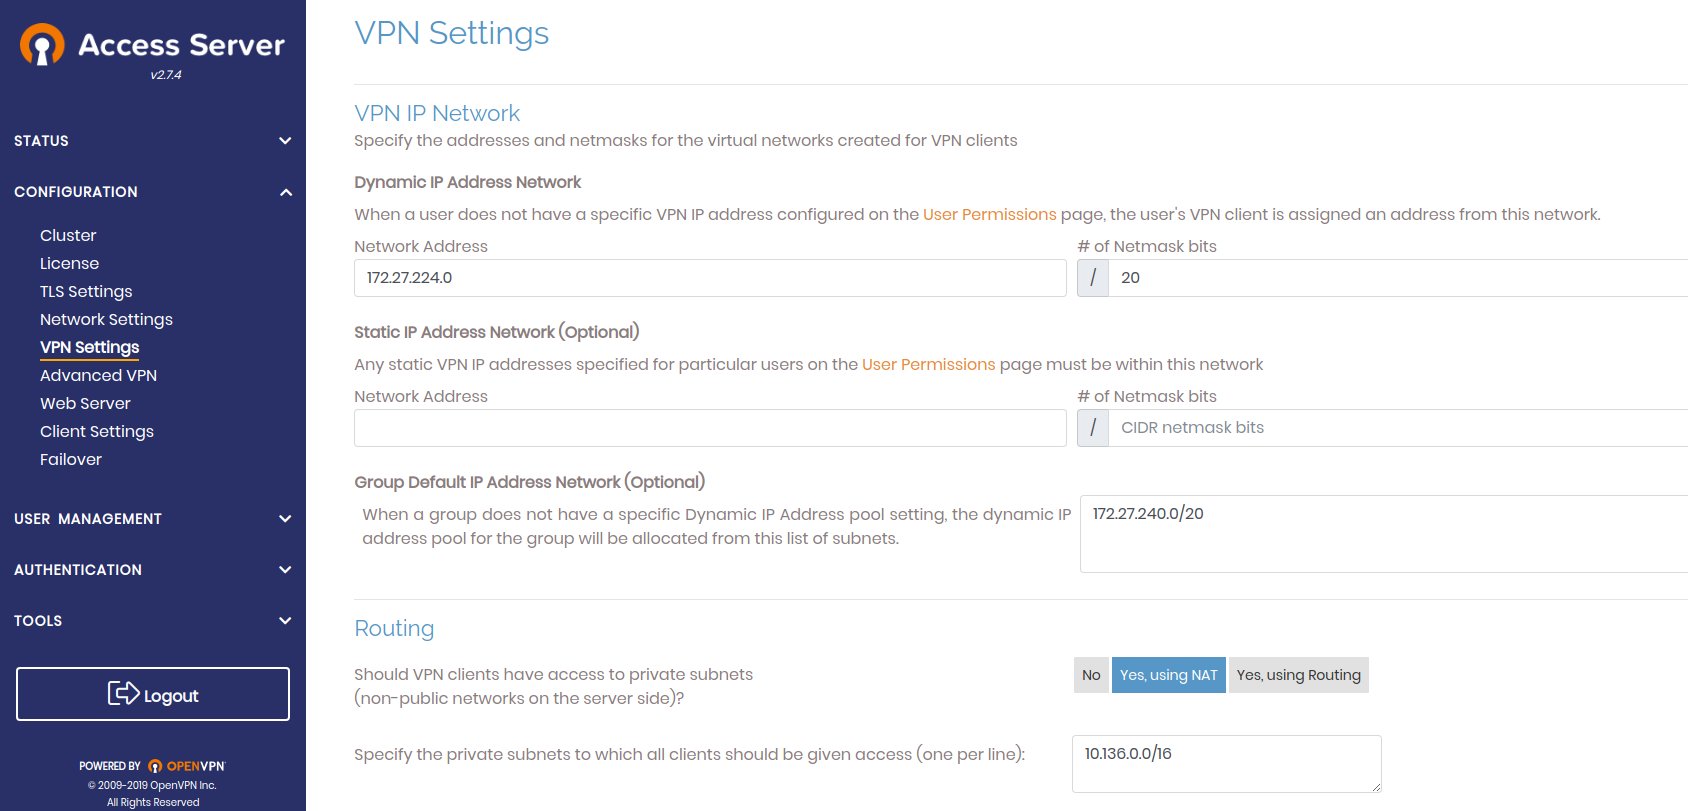
Here we got 10.136.0.0/16 from the output of ifconfig command on the droplet, you can see
there the private IP address and the netmask, you just need to extract network ip address
and number of zeros in the mask.
Now click Save Settings and then Update Running Server to apply changes.
Before we move to the next step, let us revisit the three options for routing as seen here

- The first one is to disable Routing which prevents VPN clients from accessing the private network on the server.
- The second one is the one we chose here and it enables VPN clients to access private network using NAT on the server which means that VPN Server acts NATs incoming connections to private network using the private IP address of the OpenVPN server so connections will appear as if it came from the OpenVPN server not the VPN clients.
- The third one uses routing between VPN clients and private network this means that network traffic is routed directly from VPN clients to private network and the source IP address is not changed at all, the connections appear to have originated from the VPN clients not the VPN server but this does not work with DO to know why read along please.
The Digital Ocean hypervisor that runs droplets is configured to drop any traffic that comes from strange IP addresses not assigned to a droplet which means if droplet ‘A’ has two IP addresses one private and the other is public the hypervisor will drop traffic from this droplet which does not include one of these IP addresses as the source of the packets so VPN clients which have different IP address range will not be able to route their traffic in the Digital Ocean cloud so we use NATing to solve the problem.
Create another droplet and connect to it using private IP address
Using similar steps when we created OpenVPN server we can create another droplet using Ubuntu 18.04 amd64 image and enable private networking for it.
To connect to OpenVPN from Ubuntu you can follow this tutorial here, once done connect to your new droplet and take its private IP address and try to connect using it, you should be able to as if you were inside the Digital Ocean region, now you can access private networks of Digital Ocean resources.
Before we move on I will show you how to disable Open SSH server on public network, Open this file /etc/ssh/sshd_config with your favorite
editor such as nano, look for ListenAddress and change it to ListenAddress 10.136.184.223 make sure to remove # in the beginning
of the line, 10.136.184.223 this is your droplets private IP address.
Now restart ssh with this command sudo systemctl restart ssh.
After you restart SSH disconnect from the server an try to connect again, you will get Connection refused error but
if you try to use the private IP address of the droplet you will be able to connect without errors.
Conclusion
Any DO service that uses private networking can be used in this tutorial, for example if you followed my tutorial about DO Managed Database Service and used private networking instead of public networking you can connect to the Database instance from your laptop using OpenVPN Access Server you just created here, I will leave this to you and tell me in the comments if you have any trouble with that.
I hope you find the content useful for any comments or questions you can contact me on my email address mohsen47@hotmail.co.uk
Stay tuned for more tutorials. :) :)