Digital Ocean VPC Service
Introduction
Yesterday on 28 April 2020, Digital Ocean launched its new VPC (Virtual Private Cloud) service, which is a natural development for the private networking service, that is now replaced with VPC.
A VPC allows you to create a private subnet of your own IP range and create resources in it. These resources will be isolated from other VPCs and from the internet. This could help you to create isolated environments for each one of your clients or maybe separate staging and production environments, so any issues in one of them will not affect the other.
What will we do?
In this article you will:
- Get to know the new service.
- Use the new service to create Digital Ocean droplets.
- Setup a droplet as an internet gateway for other droplets in the same VPC.
Digital Ocean VPC
Digital Ocean announced its new service in this blog, there you can read about the new service.
Open your Digital Ocean dashboard, choose Networking then VPC as shown bellow
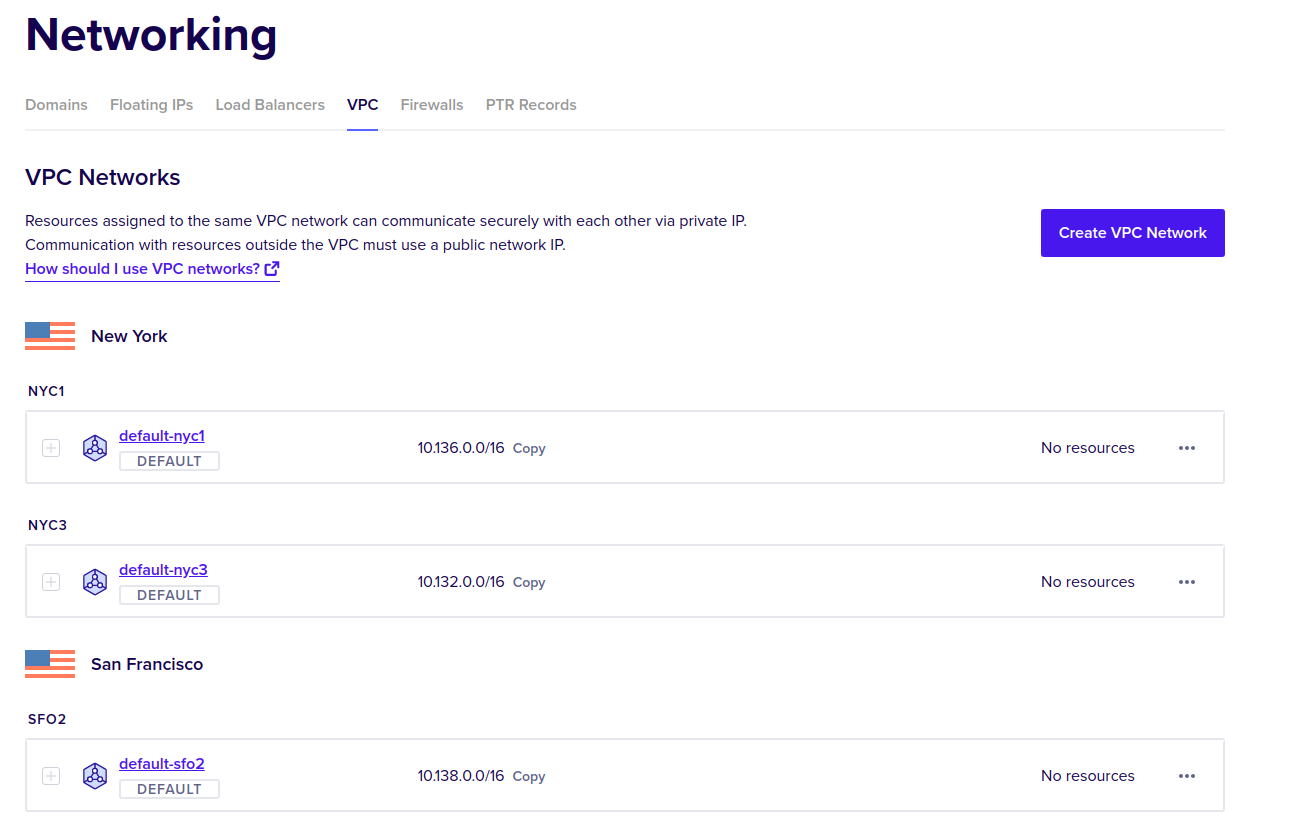
By default each region has one VPC in it that is called default-<region slug>,
this default VPC cannot be deleted and it has a private IP range that is the same
as in the old private networking service for this region, so all your previous
applications that used private networking will still work if you use the default
VPC for your resources.
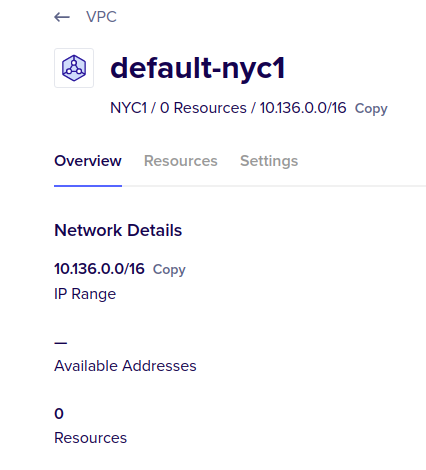
Click on one VPC such as default-nyc1, now you can see the VPC’s Overview tab
which contains information such as IP range, available addresses and number of resources
in this VPC, the Resources shows these resources and settings tab can be used
to change the name of the VPC and also add a description for it.
The following screenshot shwos the Overview tab.
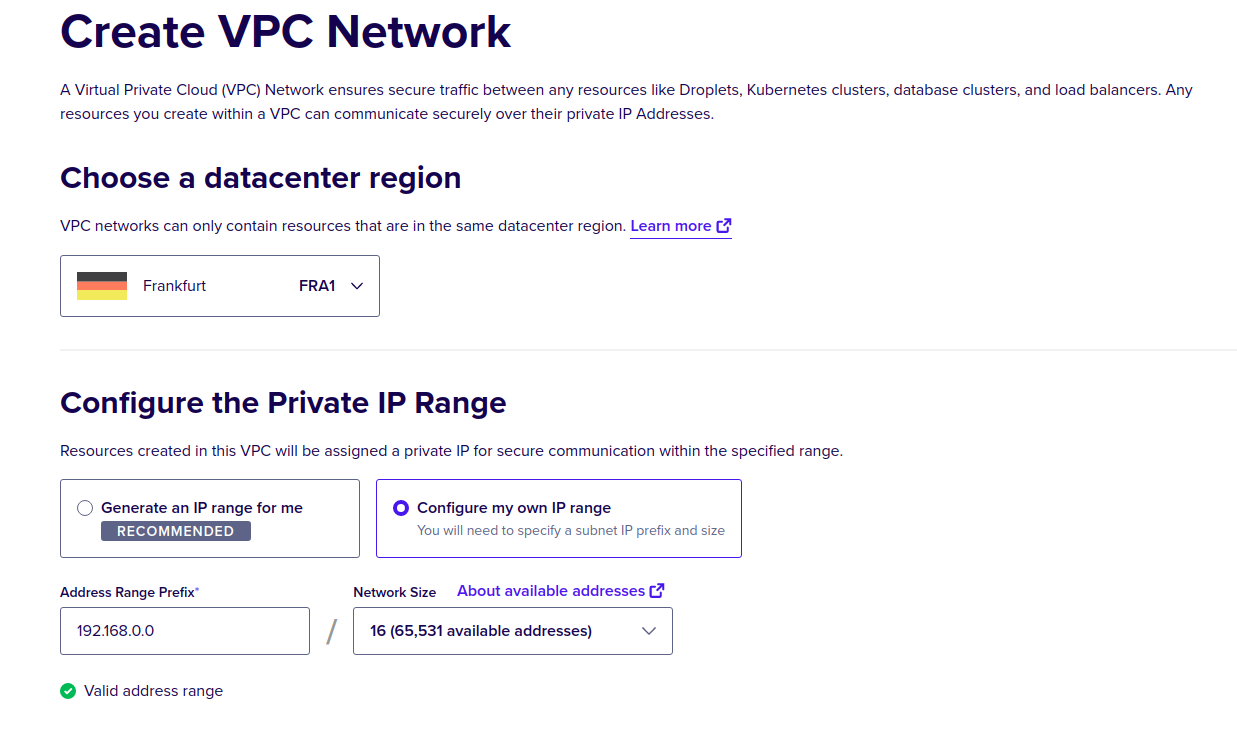
Now go back to the VPC tab in Networking page, and click on Create VPC Network.
A new page opens that shows how to create a new VPC
- Select the region where VPC will be located, only resources within this region can be added to this VPC, so choose a region where you have all the resources that must be put in this VPC.
- Configure the private IP range for the VPC, you can let Digital Ocean choose a range manually or setup your own range using a private network address.
- Choose a name for the new VPC, make sure this name clearly describes the purpose of the VPC to make it easier later to choose the VPC, also provide an optional description for the new VPC.
The following screenshot shows the page for adding a new VPC.
Create droplets within a VPC
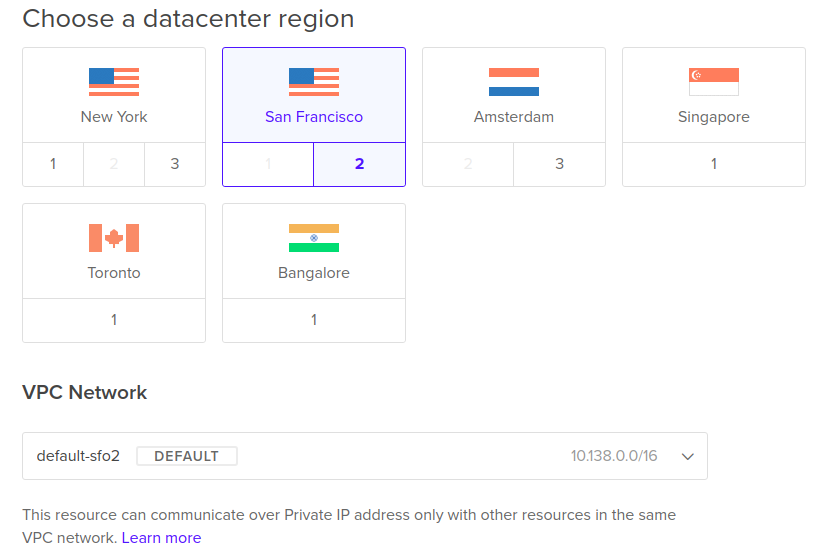
Now we will test creating droplets within one of the VPCs, choose create a new droplet.
Select the required image, size, region and name. You can see there is no more an option for private networking, it now uses VPCs instead.
We have a new section called VPC, here we will select the VPC where we want to
put our droplet in it, the drop down list automatically shows only available VPCs
in the selected region so no errors could happen.
The following screenshot shows the new section
Now Click Create Droplet and wait for the droplet to become ready.
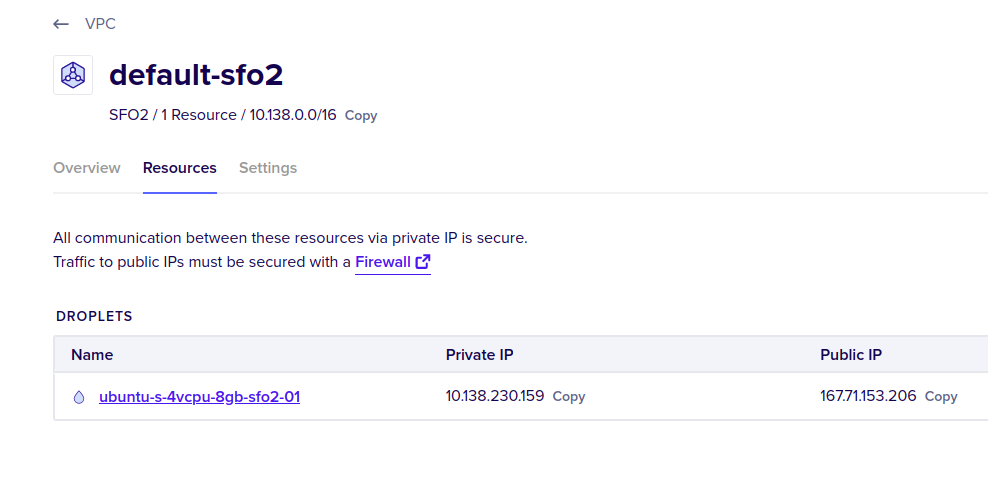
Open the VPC page for default-sfo2 and check the Resources tab, you will find
the newly created droplet there, along with its private and public IPs.
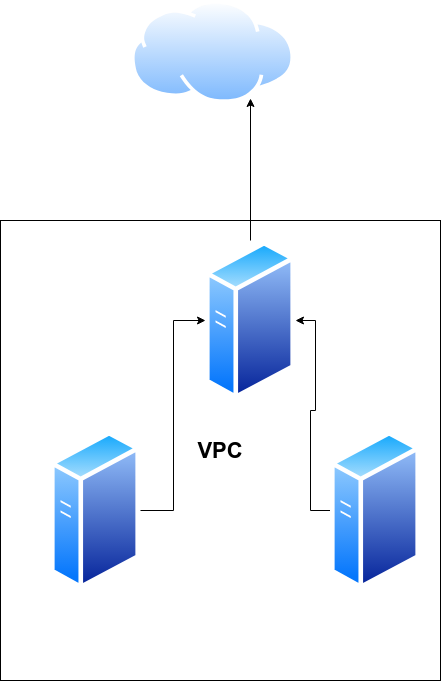
VPC gateway using a droplet
When you put multiple droplets within the same VPC you would want all of your droplets to use one droplet for internet access and not have a public IP address for communication with the internet, the following image shows the setup.
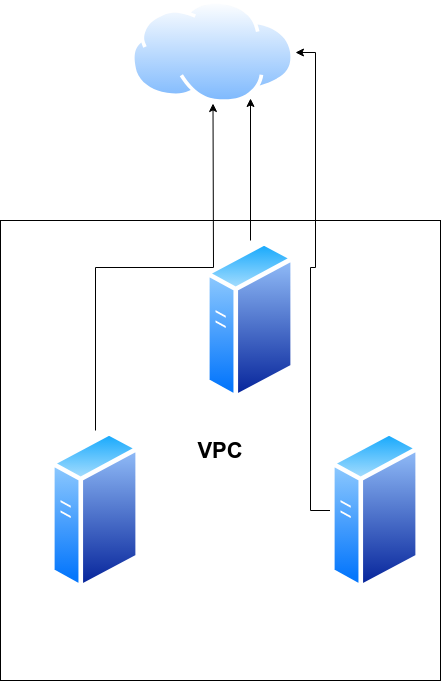
This is different from this local setup where each droplet has its own public IP address used for communication with the internet.
Hint: Digital Ocean includes a guide for configuring a droplet as a gateway in a VPC, it can be found here, I will take steps from this droplet and explain them here.
To use a droplet as a gateway for other droplets in a VPC you need to do the following:
-
On the gateway droplet enable IP Forwarding, this allows the droplet to act as a router and route traffic from other droplets to the internet and vice-versa.
use this command to enable IP forwarding.
sysctl -w net.ipv4.ip_forward=1To make the changes persistent, add this line
net.ipv4.ip_forward=1to the file/etc/sysctl.conf. - On the gateway droplet configure NAT, Network Address Translation allows us
to use a single IP address to provide internet access for other multiple
addresses, to enable NAT use this command
iptables -t nat -A POSTROUTING -s <vpc_network_prefix> -o <public_interface_name> -j MASQUERADEThe
<vpc_network_prefix>can be obtained from the VPC page, and the public interface name is eth0 on Ubuntu droplets, to make sure useifconfigcommand and search for the network interface with a public IP address.To make these changes persistent to iptables use this package
iptables-persistentwhcih can be installed using this commandsudo apt-get install iptables-persistentWhen installed for the first time it will ask to save current iptables rules, to save these rules later when you change them use this command
iptables-save > /etc/iptables/rules.v4 -
On every other droplet in the VPC configure the new gateway.
SSH to the backend droplet, using this command
ssh -o ProxyCommand="ssh -W %h:%p root@<public_IP_of_gateway_Droplet>" root@<private_IP_of_backend_Droplet>Repalce with the public IP address of Gateway droplet and the private IP of backend droplet, we are using this command because once we apply the new gateway we will lose connectivity over the public network, so use the private IP address of the droplet.
Execute this command to change the gateway
ip route change default via <private_IP_of_gateway_Droplet>The private IP of gateway droplet can be found in the droplet’s page.
If you are using Ubutnu open this file
/etc/netplan/50-cloud-init.yaml, to make routing chage permanent, but first make sure to take backup of it.Look for the line that syas
gateway4and comment it with a#.Inside the
eth1configuration add these liensroutes: - to: 0.0.0.0/0 via: {PRIVATE IP ADDRESS OF YOUR GATEWAY DROPLET}This tells the droplet to use the new gateway every time it boots. BE VERY CAREFULL with indentation and DO NOT USE TABS, as YAML files are very sensitive to small errors in indentation.
If you are using Debian you can make the change permanent by adding this line
post-up ip route change default via <private_IP_of_gateway_Droplet> table mainTo
/etc/network/interfacesin the section for the private network interface you have, it is probablyeth1.
Conclusion
In this article we learned about new Digital Ocean service, and how it can be used, in future articles we will explore how to secure access to the VPC resources using VPN connections, we have shown previously here how to secure access using OpenVPN Access Server, however here we will explore other options.
I hope you find the content useful for any comments or questions you can contact me on my email address mohsen47@hotmail.co.uk
Stay tuned for more articles. :) :)