Wordpress shared content on NFS server
Introduction
The previous tutorials which can be found here, here and here, all of them explored how to host Wordpress site on a single Digital Ocean droplet with a managed database, this is enough for a small Wordpress sites but as our site grows bigger and bigger we need to increase the computing power that we have, also we need to eliminate any single points of failure for our site.
From now on we will explore what needs to be done to make our Wordpress sites more available and able to handle bigger loads without any single points of failure.
In this tutorial we will show how to host the Content Directory for Wordpress
in a shared NFS server, install FTP server for installing Wordpress plugins.
What will we do?
This tutorial assumes you followed a previous one here.
In this tutorial we will:
- Create a droplet for NFS and export a shared directory from it.
- Mount the share on Wordpress server and move
wp-contentdata to it. - Install FTP server on Wordpress and test installing plugins in Wordpress.
Setup NFS
Create a new Digital Ocean droplet called nfs-server, login to the new droplet
and execute this command to install NFS:
apt install nfs-kernel-server -y
After NFS is installed we will create a new shared directory using this command
mkdir -p /var/nfs/wp-content
This directory will hold the files and directories located in wp-content
Wordpress directory, here we can find plugins and user uploads so this folder
must be accessible by the web server user www-data and local normal
user which we will create shortly and it will be given an ID of 1000.
To make sure that permissions are set correctly use this command
chmod g+w /var/nfs/wp-content
chmod g+s /var/nfs/wp-content
chown 1000:33 /var/nfs/wp-content
The first command gives write permissions to all members of directory’s group.
The second command sets the setgid bit for the directory, this causes
any new file or directory created to have the same group as the parent
directory and not use the creator’s group.
The third command sets the IDs for the owner and the group of the directory here we are using numerical IDs directly because the users are not synced between Wordpress and NFS droplets, 1000 is the ID of the user that will connect using FTP to Wordpress server and 33 is the group ID for www-data, this will enable the web user to read and write files inside wp-content.
Now we need to add this line to the file /etc/exports to export the shared
directory
/var/nfs/wp-content <wordpress_ip>(rw,sync,no_subtree_check,no_root_squash)
The first part is the path to the shared directory, the second one is the IP address of the client allowed to mount this directory, and then we have NFS options described as follows:
- rw: Give the user read and write permissions.
- sync: Do the actual write to the disk on server before returning success to client.
- no_root_squash: This makes the NFS server uses the user ID from the client when checking for permissions on the server.
- no_subtree_check: Disable subtree checking when accessing files to increase performance.
After adding the previous line execute this command to restart NFS and apply changes
systemctl restart nfs-kernel-server
Mount shared directory on Wordpress droplet
Now after we have prepared the shared directory on NFS server, we will move to
the Wordpress droplet to move the wp-content directory to the shared directory
on NFS server.
First we need to install a package required for NFS client to work
apt install nfs-common -y
Second we must mount the shared directory to /mnt folder using this command
mount <nfs_ip>:/var/nfs/wp-content /mnt
Now after the mount is ready we must move all the contents of wp-content directory
to the mounted folder with this command
cp -r /var/www/html/wordpress/wp-content/* /mnt
This could take some time according to the network bandwidth and the size of Wordpress wp-content directory, after this is done execute these commands
rm -rf /var/www/html/wordpress/wp-content/*
umount /mnt
mount <nfs_ip>:/var/nfs/wp-content /var/www/html/wordpress/wp-content
First we removed all the files from the local wp-content directory, then we unmounted the share and mounted it again at the right path so wordpress will continue to work after this is done and any writes and reads to/from the wp-content directory will actually happen on the shared directory on NFS server.
Setup FTP and install Wordpress plugin
When working on Wordpress sites we need to install FTP on the server, because Wordpress relies on FTP access to install plugins.
To install FTP execute this command
apt install vsftpd -y
After FTP is installed we need to modify its configuration in the file
/etc/vsftpd.conf, modify these lines as follows
write_enable=YES
chroot_local_user=YES
The first line allows FTP users to upload files to the server which is disabled by default and the second one limits users to their home directories when accessing the server using FTP.
Now we need to create a new user to be used in FTP using this command
adduser --home /var/www/html/wordpress wp
chown -R wp:www-data /var/www/html/wordpress/wp-content
Enter a password for the new user, this will add a new user called wp
and set his home directory to /var/www/html/wordpress.
Now restart FTP for changes to its configuration file to take effect.
systemctl restart vsftpd
Now you can connect to the server using any FTP client and read/write files in the wp-content directory which is needed by Wordpress to install plugins.
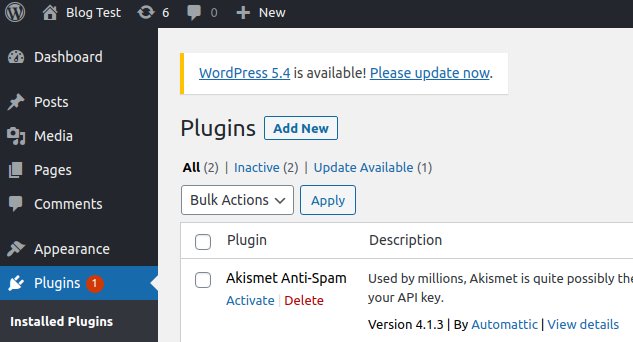
Open your browser and browse to this URL http://wordpress_ip/wordpress/wp-admin,
login using admin credentials you created previously and choose plugins from left
side bar as shown in the image.
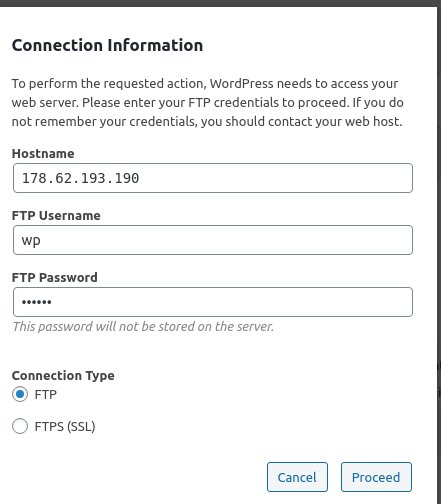
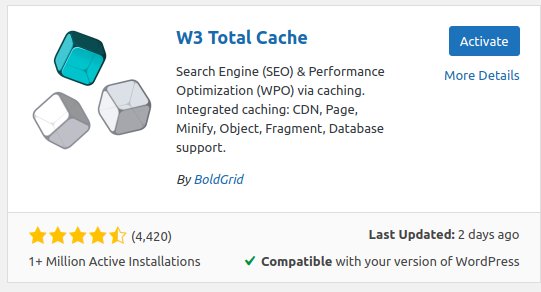
Click on Add new and enter Cache in Search box then choose to install the plugin
called W3 Total Cache then click install and enter your FTP credentials
as shown in this image (Do not forget to replace them with your own values)
Now the plugin is installed as shown here
Now we have Wordpress shared wp-content directory on NFS server and ready to install Wordpress on multiple Digital Ocean droplets and use a Load Balancer for them.
Conclusion
In this tutorial we learned how to put the shared directory wp-content on a shared
NFS folder which will help us later to install Wordpress on multiple droplets.
Later we will use a Digital Ocean Load Balancer and multiple droplets to host our Wordpress site for better performance.
I hope you find the content useful for any comments or questions you can contact me on my email address mohsen47@hotmail.co.uk
Stay tuned for more articles. :) :)