Using Digital Ocean Load Balancer with Wordpress
Introduction
In the previous tutorial we showed how to put Wordpress shared directory on NFS server and access it from Wordpress droplet, now we will expand on our previous tutorial and put Wordpress on multiple droplets then use Digital Ocean Load Balancer to access Wordpress site.
What will we do?
Make sure you followed all the steps in previous tutorial
In this tutorial you will
- Install Wordpress on another droplet as done in here.
- Configure NFS to allow mounting from the new droplet.
- Create a new Digital Ocean Load Balancer and configure it to forward traffic to the droplets.
Install Wordpress on new droplet
After creating the new droplet we need to install Wordpress on it by installing apache and PHP-FPM using this command
apt install apache2 php-fpm php-mysql php-gd -y
The previous command installs apache, php-fpm and some php extensions on the droplet, we did not install PHP interpreter because we want to use php-fpm and apache’s event MPM as it has a very good performance as shown in here.
Now enable PHP-FPM and restart apache with these commands
a2enmod proxy_fcgi setenvif
a2enconf php7.2-fpm
systemctl restart apache2
Now we must install Wordpress to the droplet and untar it to the web root as we did previously, using these two commands
wget https://wordpress.org/latest.tar.gz
tar -zxf latest.tar.gz -C /var/www/html
We need to do one last thing copy the wp-config.php file from the old droplet
to the new one, so the droplets will share the same configuration options for
Wordpress, to do this we need first to generate a new SSH key on the old droplet,
copy the contents of its public key to ~/.ssh/authorized_keys on new droplet
and then copy the file over SSH.
To generate a key on old Wordpress droplet execute
ssh-keygen
Print the contents of public key using
cat ~/.ssh/id_rsa.pub
Copy them and paste in ~/.ssh/authorized_keys on new droplet.
From the old droplet execute this command
scp /var/www/html/wordpress/wp-config.php root@new_droplet_ip:/var/www/html/wordpress/wp-config.php
Now wordpress is ready on both droplets except for the wp-content directory, which is not shared yet, in the next section we will modify NFS server to allow mounting the directory from new droplet and then mount it.
Mount wp-content on new Droplet
Login to the NFS droplet and modify the line that shares the wp-content directory
in /etc/exports to become as follows
/var/nfs/wp-content <wordpress_ip>(rw,sync,no_subtree_check,no_root_squash) new_droplet_ip (rw,sync,no_subtree_check,no_root_squash)
Restart NFS for changes to take effect
systemctl restart nfs-kernel-server
Now login to the new droplet and execute these commands
rm -rf /var/www/html/wordpress/wp-content/*
apt install nfs-common
mount <nfs_ip>:/var/nfs/wp-content /var/www/html/wordpress/wp-content
The first command makes sure that wp-content directory is cleared and the second one installs nfs client to enable mounting NFS shares here and the third one mounts the shared directory on /var/www/html/wordpress/wp-content.
Now try to open your site from the new droplet, did it work?
You will get the following error “Error establishing a database connection” as shown here, this is because the Database cluster is configured to accept connections only from the first Wordpress droplet.
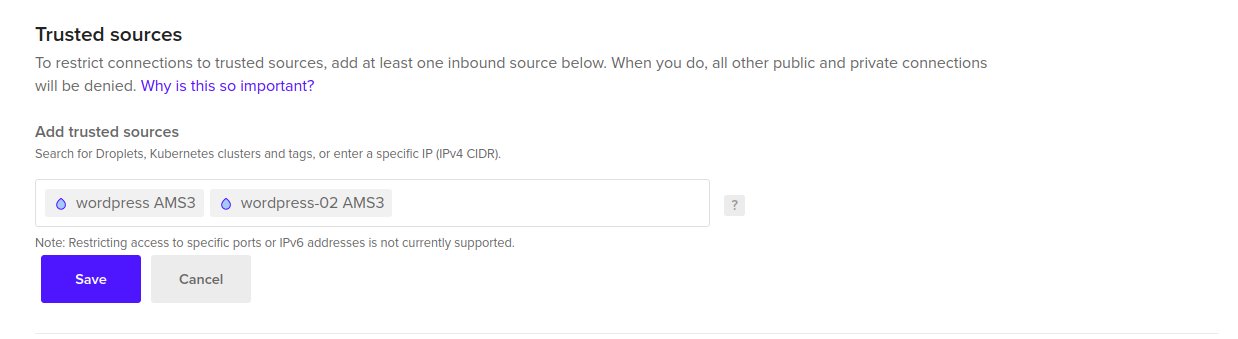
To fix this go to the Database cluster settings and add the new droplet to the list of inbound sources as show bellow.
Now your site loads correctly and you think that it worked, but actually no, try to look at your page source and check the URL for one of your JavaScript or CSS files as shown in the image bellow

Here you can see the IP address of your old droplet and not of the new one, so what happened here? Why is my Wordpress on the new droplet fetching resources from the old one?
To answer your question we need to understand that wordpress uses full addresses
when generating HTML pages, so if you have a css file called style.css, in the
HTML page it is included using its full address http://domain.name/css/style.css
and not its relative address /css/style.css, this kind of information is stored
in a special table called wp_options, this table includes two rows called
siteurl and home which contain the domain name for the Wordpress site, and
these are added to every static resource you use on Wordpress.
We will modify this table in the next section when we add the Digital Ocean Load
Balancer and use the Load Balancer’s IP address for siteurl and home.
Create a Load Balancer for Wordpress
Now is the time to create and configure the Load balancer for our Wordpress site,
we will use the IP address for this load balancer in the siteurl and home options
so all access to the site will be through the load balancer, then it will send
traffic to the right droplet.
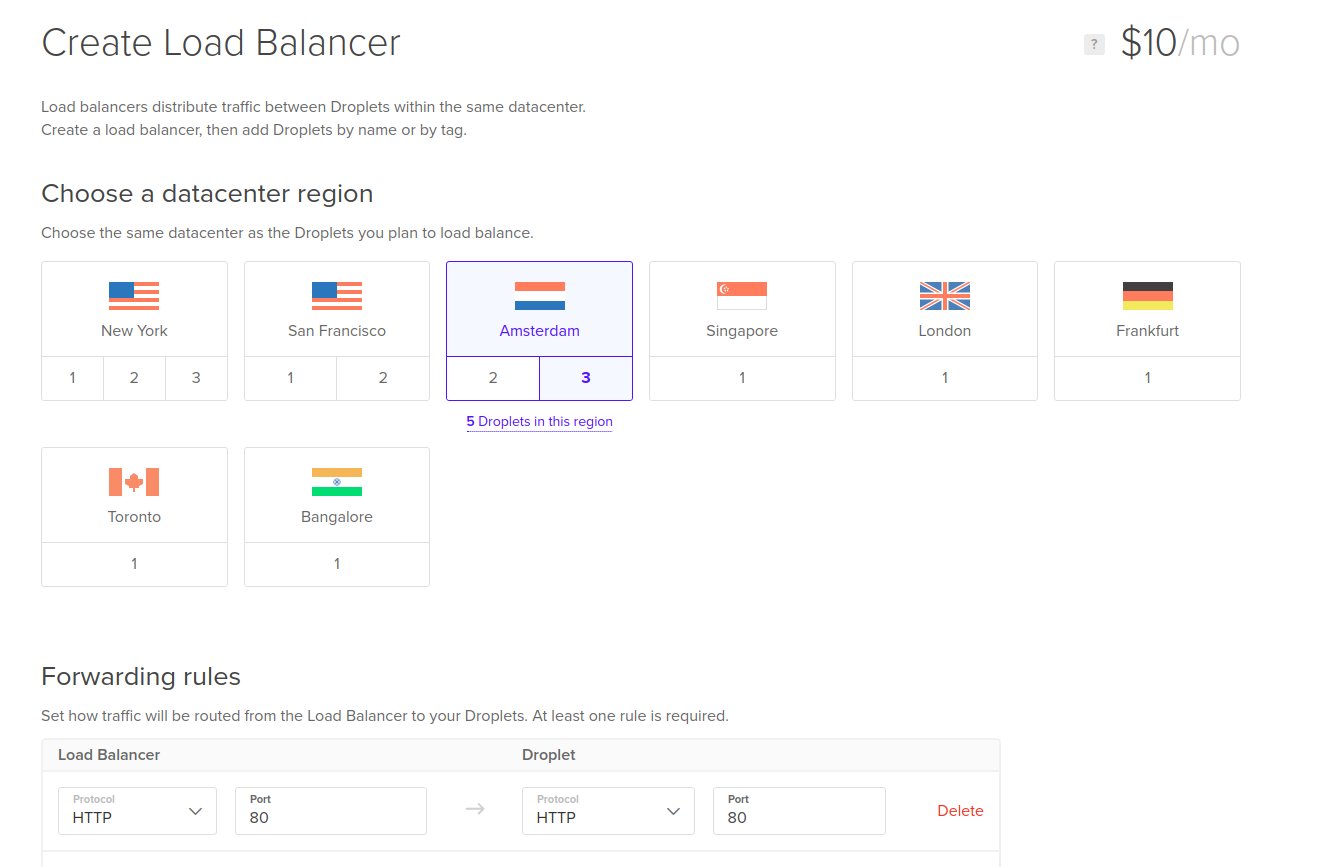
To create a new load balancer select Load Balancers from the Create menu as shown here

Select the same region as your droplets and also make sure the forwarding rule is from HTTP port 80 to HTTP port 80 as shown here
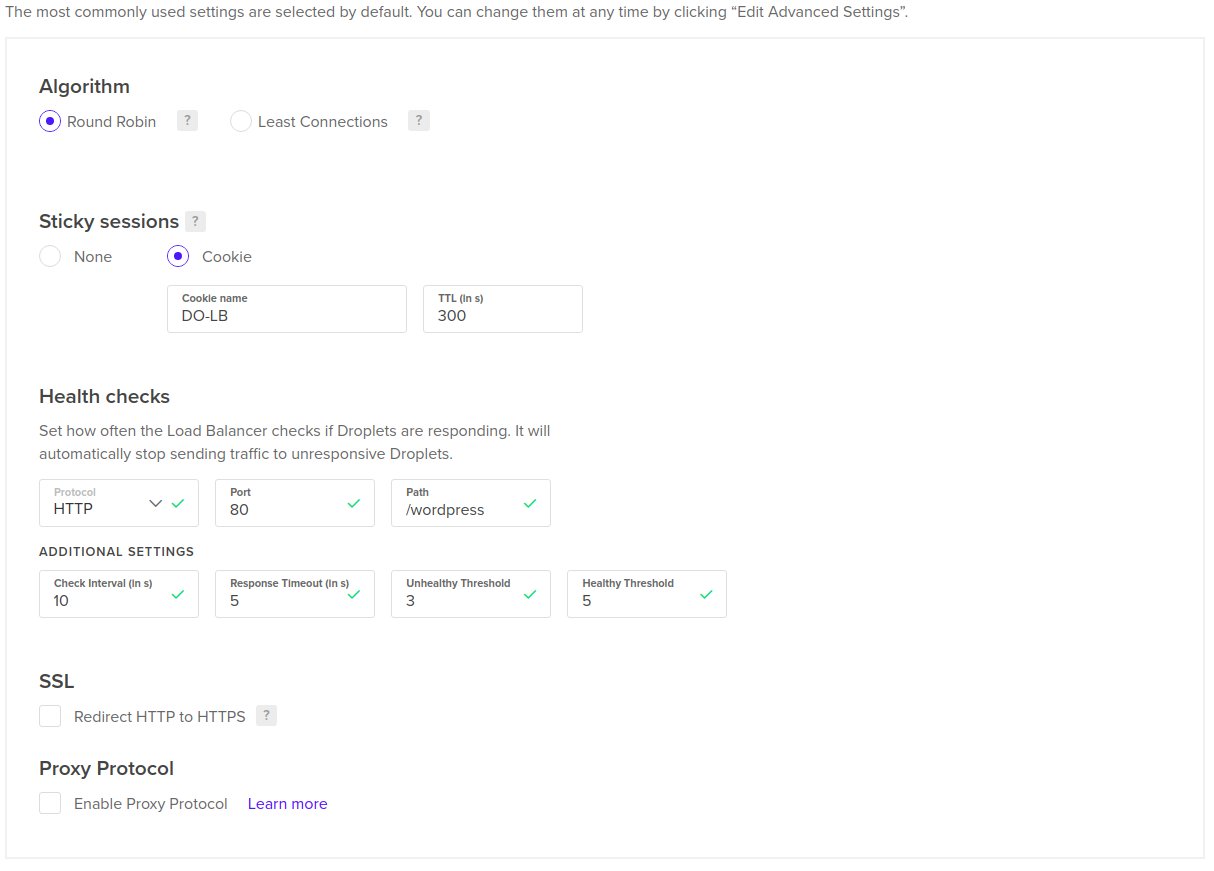
Click on Edit Advanced Settings and enable sticky sessions using Cookie
and change the health check path to /wordpress as shown here
Now click on Create Load Balancer to finsih the configuration.
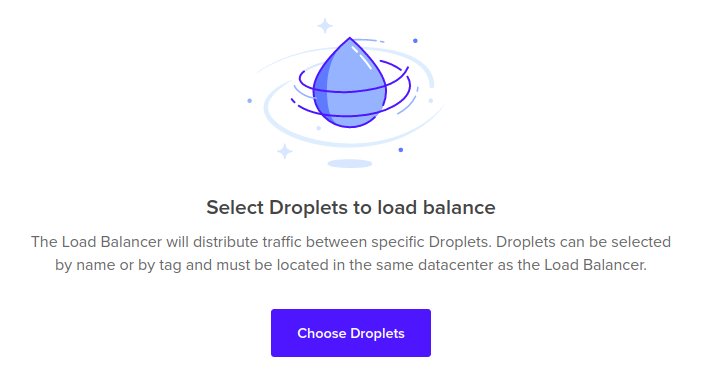
After the Load Balancer is created click on Choose Droplets as shown bellow
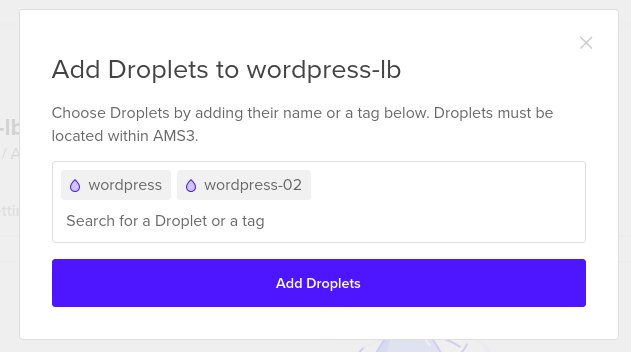
Here you can enter droplet tags or droplet names, if you use tags any new droplets tagged with the used tag will be added to the Load Balancer automatically, here we will put the names of our Wordpress droplets, as shown in the image
Now our load balancer is configured to forward HTTP traffic that arrives to it, to the Wordpress droplets as shown in the image bellow. (Wait few minutes for status to become Healthy)
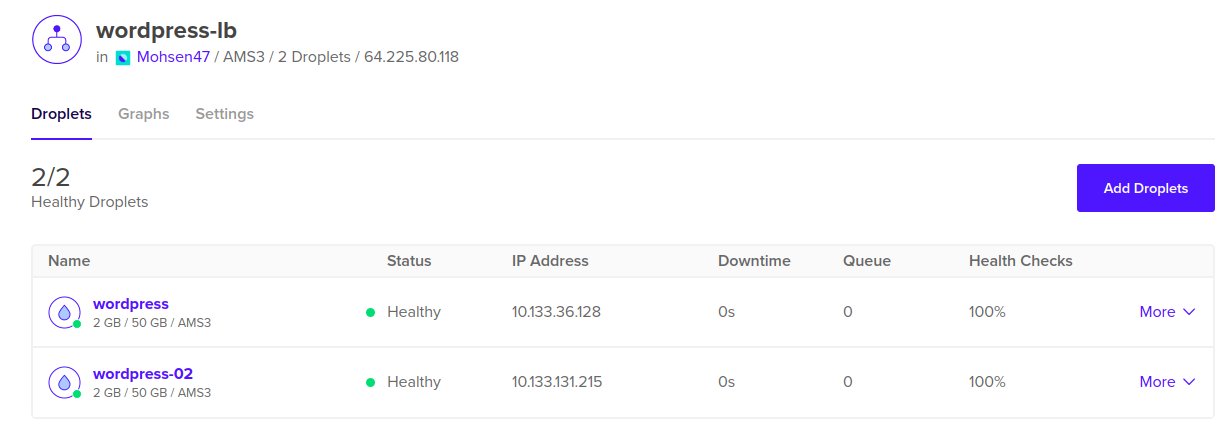
Now you can try to access your Wordpress from the Load Balancer using its IP address, it can be found next to the Load Balancer’s name as shown here

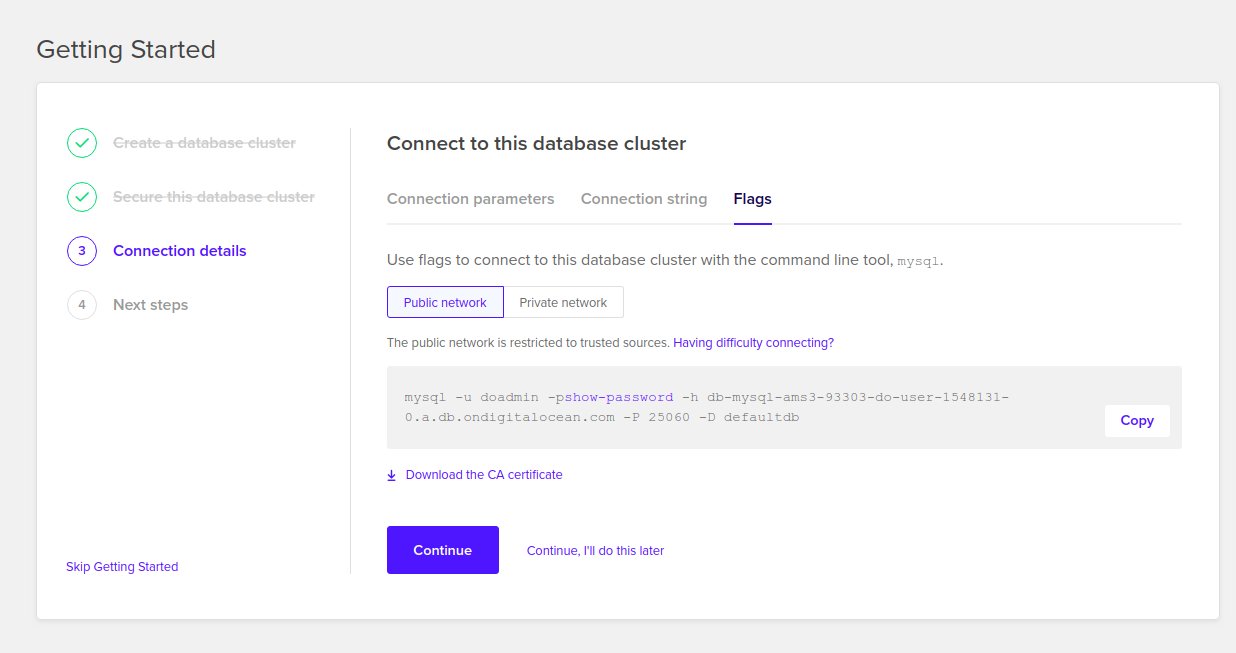
Now we need to change the values for siteurl and home in wp_options table,
first login to your Database cluster by copying the right command from the
Cluster’s page as show bellow
Execute these queries to modify the table
use wp;
update wp_options SET option_value = 'http://<load_balancer_ip>/wordpress' where option_name LIKE 'siteurl';
update wp_options SET option_value = 'http://<load_balancer_ip>/wordpress' where option_name LIKE 'home';
Now your Wordpress site works correctly, and if you check the URLs for static resources in the HTML code they all go through the Load Balancer now, as it should be.
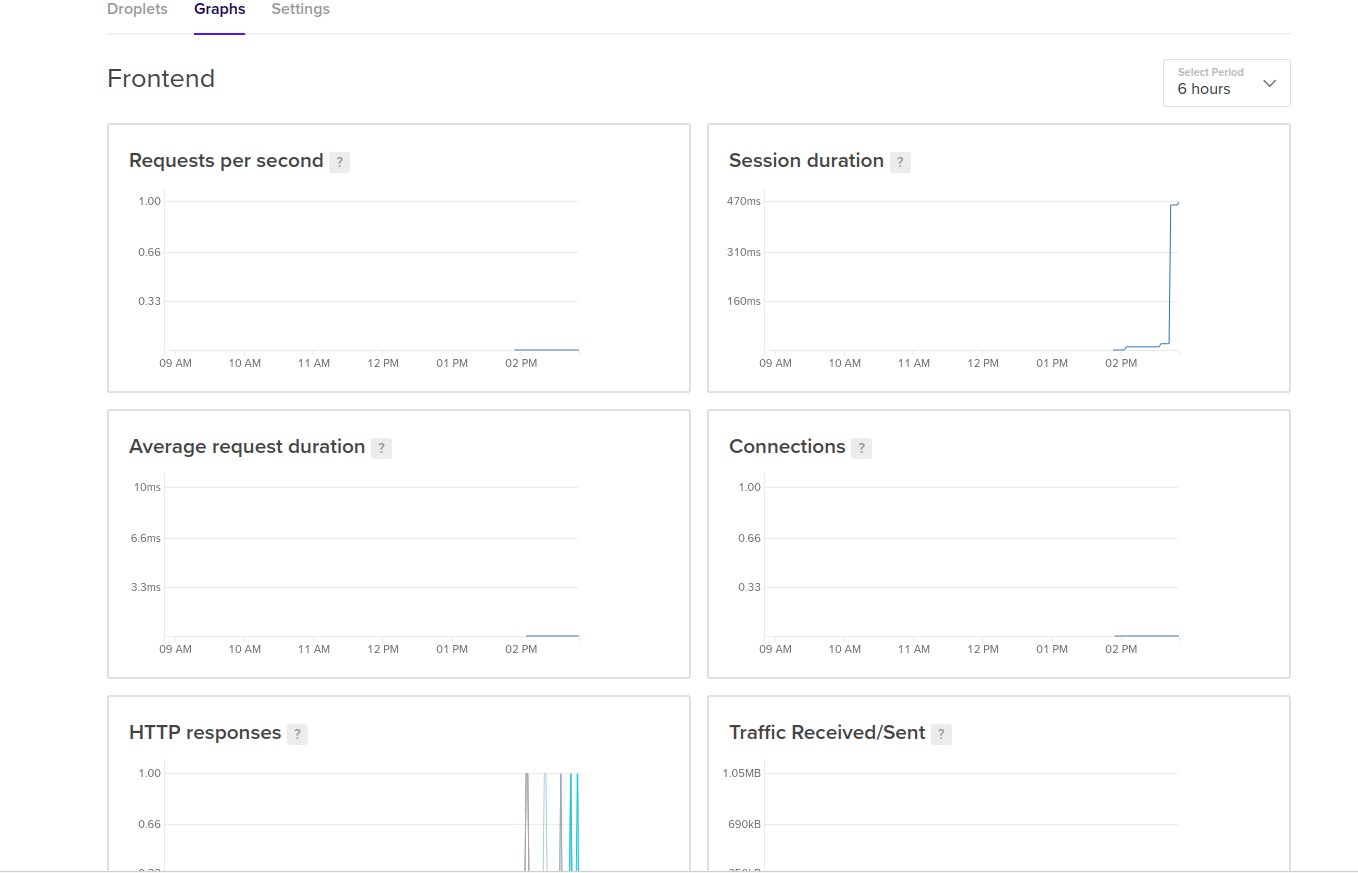
The Load Balancer’s page gives you HTTP stats about your Website as shown in the Graphs tab bellow.
Conclusion
In this tutorial we learned how to install Wordpress site on multiple droplets and use a Load Balancer from Digital Ocean to distribute traffic between the droplets which will enable to load balance traffic and serve more users.
So far we used a single NFS server for shared storage, we can use a file cluster or maybe the Digital Ocean Spaces service, this will be discovered later.
Also we will explore more security features for our setup and come at the end with a full guide for hosting Wordpress on Digital Ocean, support me by sharing my tutorials and telling your friends about it and stay tuned for more.
I hope you find the content useful for any comments or questions you can contact me on my email address mohsen47@hotmail.co.uk
Stay tuned for more articles. :) :)